# Kaleido HiBean BLE Firmware
# SnowBear Firmware Installation
Kaleido currently uses Classic Bluetooth to talk to HiBean a dated standard that, importantly, isn't supported on iOS at all. This project is a workaround that finally brings Kaleido connectivity to iPhones and iPads. It also pairs nicely with Bear's bridge for connecting devices over BLE Serial, which sidesteps the long-standing issues Classic Bluetooth SPP has on macOS, especially on Apple Silicon. Brought to you by Bear of the Skywalker community, with support from Will\_Z at HiBean.
[](https://skywiki.coffee/uploads/images/gallery/2026-05/hD8image.png)
**Machines Confirmed Kaleido Roasters that work:
M1 Lite
M1 Pro
M2 LEGACY (Unsealed)**
### **Requirements**
**This is still in Beta and code is still being worked on. Please report any issues you have to our Community Discord.**
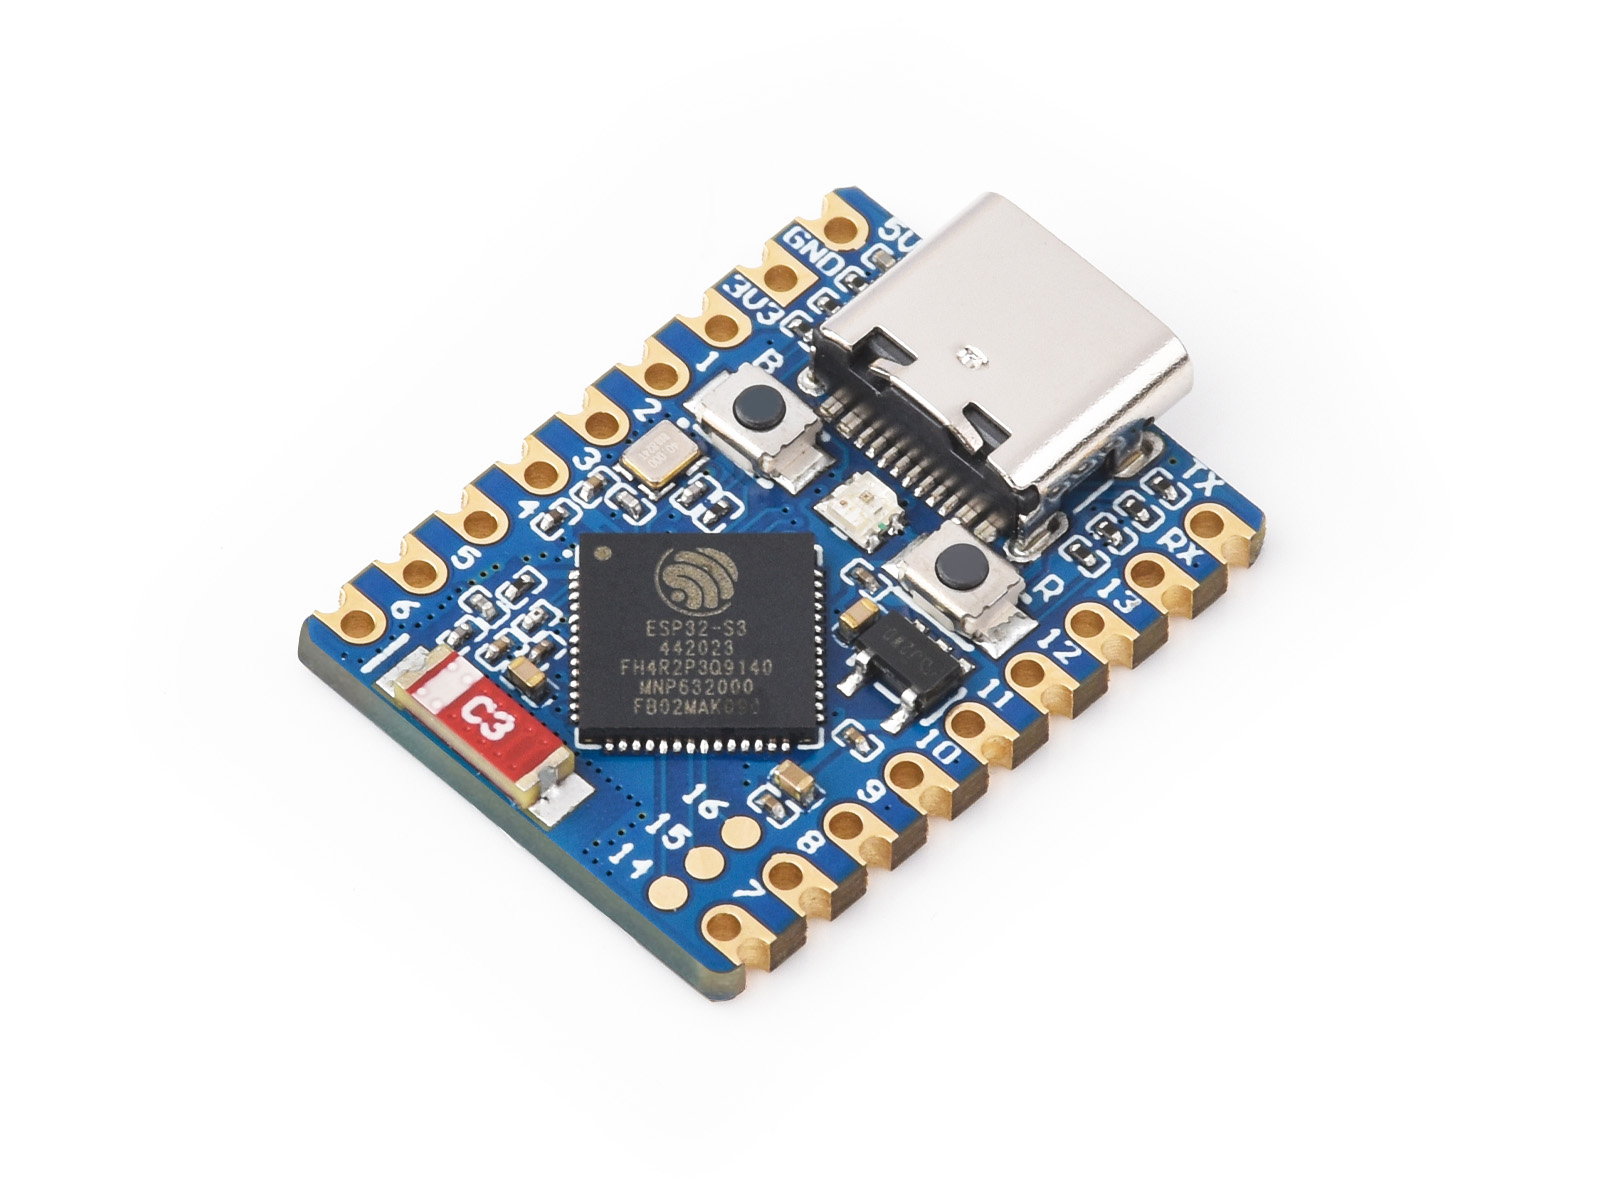
1. [**ESP32-S3**:](https://www.amazon.com/Waveshare-Development-ESP32-S3FH4R2-Dual-Core-Processor/dp/B0CHYHGYRH/?_encoding=UTF8&pd_rd_w=r9sWT&content-id=amzn1.sym.255b3518-6e7f-495c-8611-30a58648072e%3Aamzn1.symc.a68f4ca3-28dc-4388-a2cf-24672c480d8f&pf_rd_p=255b3518-6e7f-495c-8611-30a58648072e&pf_rd_r=5B6XB3S76AN41GG53BPF&pd_rd_wg=jrSyV&pd_rd_r=0c2acad7-cc3f-40c5-8e89-116521cb0165&ref_=pd_hp_d_atf_ci_mcx_mr_ca_hp_atf_d)
Ensure you have the ESP32-S3 board
[](https://skywiki.coffee/uploads/images/gallery/2025-01/9Edimage.png)
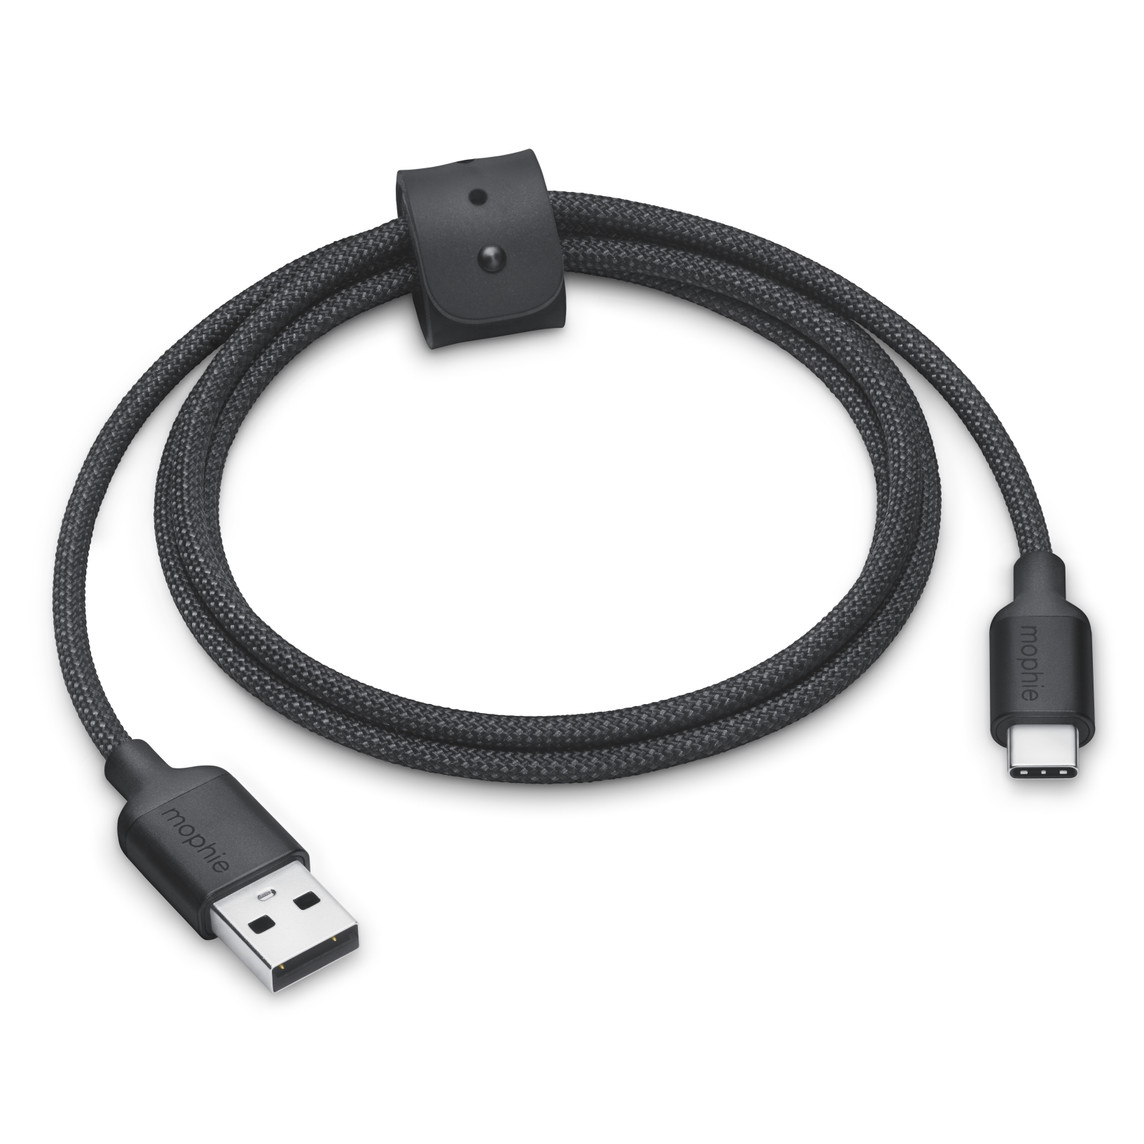
2. USB A Male to USB C Male Cable (UART)
[](https://skywiki.coffee/uploads/images/gallery/2026-06/ifzimage.png)
or
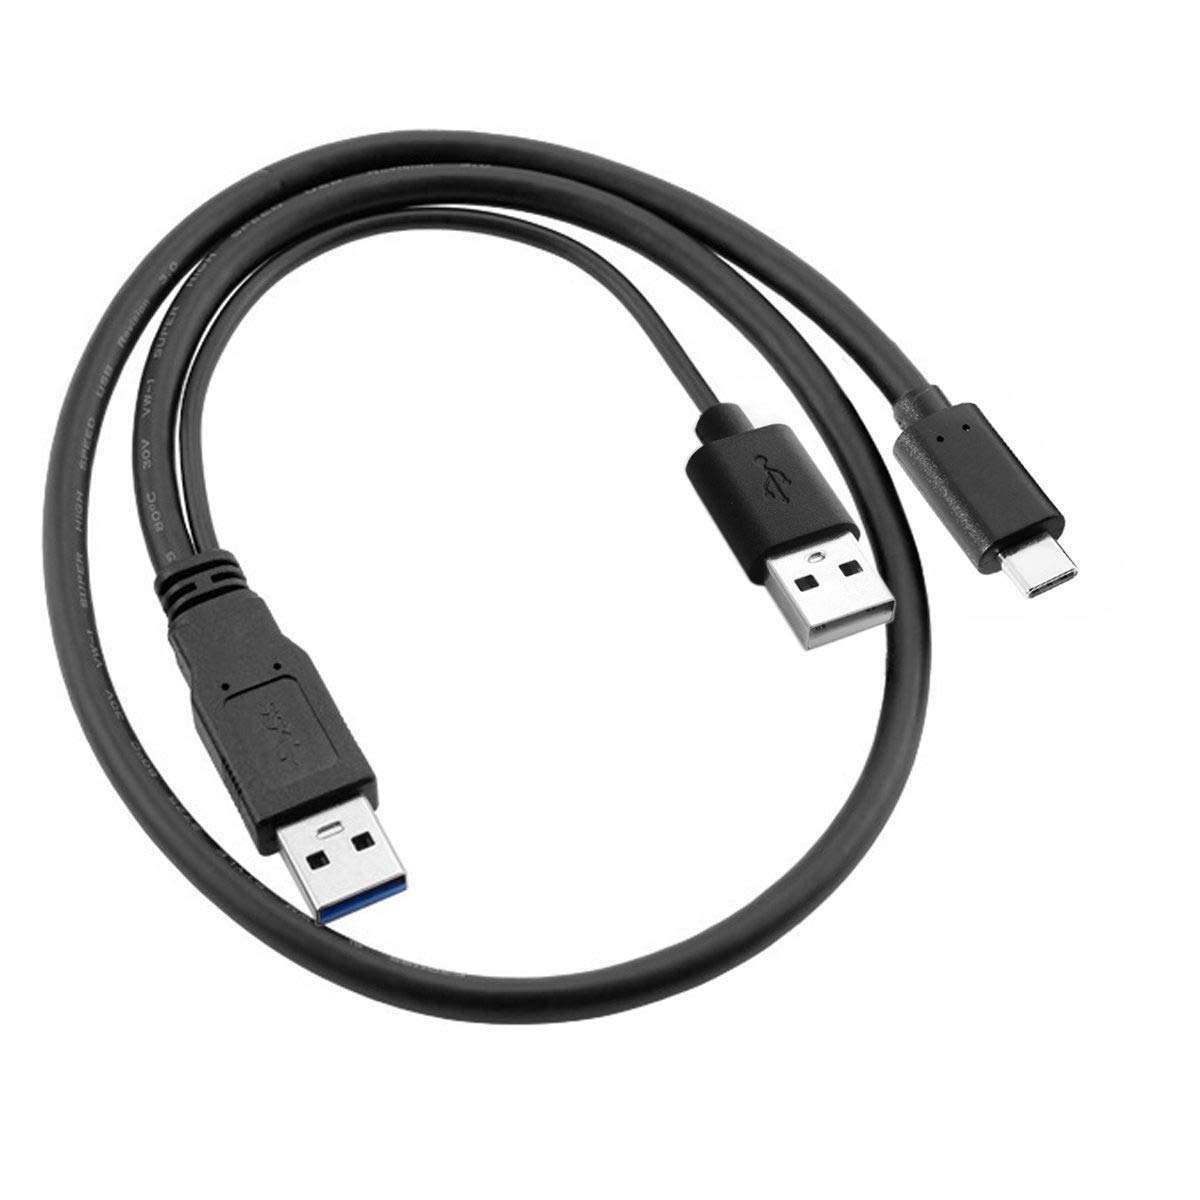
[C Splitter Dual (CP210x)](https://www.amazon.com/Cablecc-Type-C-USB-C-Power-Laptop/dp/B07VVX257H/ref=sr_1_1_pp?crid=1023POZXOBD5H&dib=eyJ2IjoiMSJ9.vC_z1K13EDIArR4bDN70N1dNcZrkJRQTIHwLSQvwYgFk3a_SXs52HCV0zMPOzZnPvHU3_tHiCr11XI4PJEcN-O5xEnGvZ3gY2ITc8omLOFV373DJ_J9f3zjK6IS85ihyHhImGk1QEmqC-JHvKDkTd_wlMRmYaf0IsdZUjBpZgHKgupKxBy_Yqm97Bnb0-vW9g-mDtZkA6e9DUcQOE5byMfFjkLqO9WxqjWXnk_WeUww.dvicPWvbyii2YXPwild8J2GNplxeY9hNkFY79hE6gJ4&dib_tag=se&keywords=usb%2BC%2Bsplit&qid=1781209057&sprefix=usb%2Bc%2Bspl%2Caps%2C277&sr=8-1&th=1)
[](https://skywiki.coffee/uploads/images/gallery/2026-06/DgGimage.png)
3. **Binary File Link**:
[SnowBear UART (Kaleido Tablet Top USB Port)](https://github.com/galangl/kaleido_sniper/blob/main/SnowBear/snowbear.bin)
[SnowBear USB CP210x (Artisan Bottom USB port)](https://github.com/galangl/kaleido_sniper/blob/main/SnowBear/BLE_host_v1.2z_Kaleido%20M1%20Lite.bin)
4. **Browser**:Use Google Chrome or Microsoft Edge (supports Web Serial)
[ESPHome](https://web.esphome.io/)
---
### **Steps**
#### **1. Download the Binary File**
1. Open the [GitHub link](https://github.com/galangl/kaleido_sniper/tree/main/SnowBear)
1. [Tablet UART Top Port](https://github.com/galangl/kaleido_sniper/blob/main/SnowBear/snowbear.bin)
2. [Artisan Bottom USB Port](https://github.com/galangl/kaleido_sniper/blob/main/SnowBear/BLE_host_v1.2z_Kaleido%20M1%20Lite.bin)
2. Click on the download raw file icon to download 
---
#### **2. Open ESPHome Web**
1. Go to [ESPHome Web](https://web.esphome.io/)
in your Chrome or Edge browser.
2. Make sure your ESP32-S3 is connected to your computer using a USB cable.
---
#### **3. Connect the ESP32-S3**
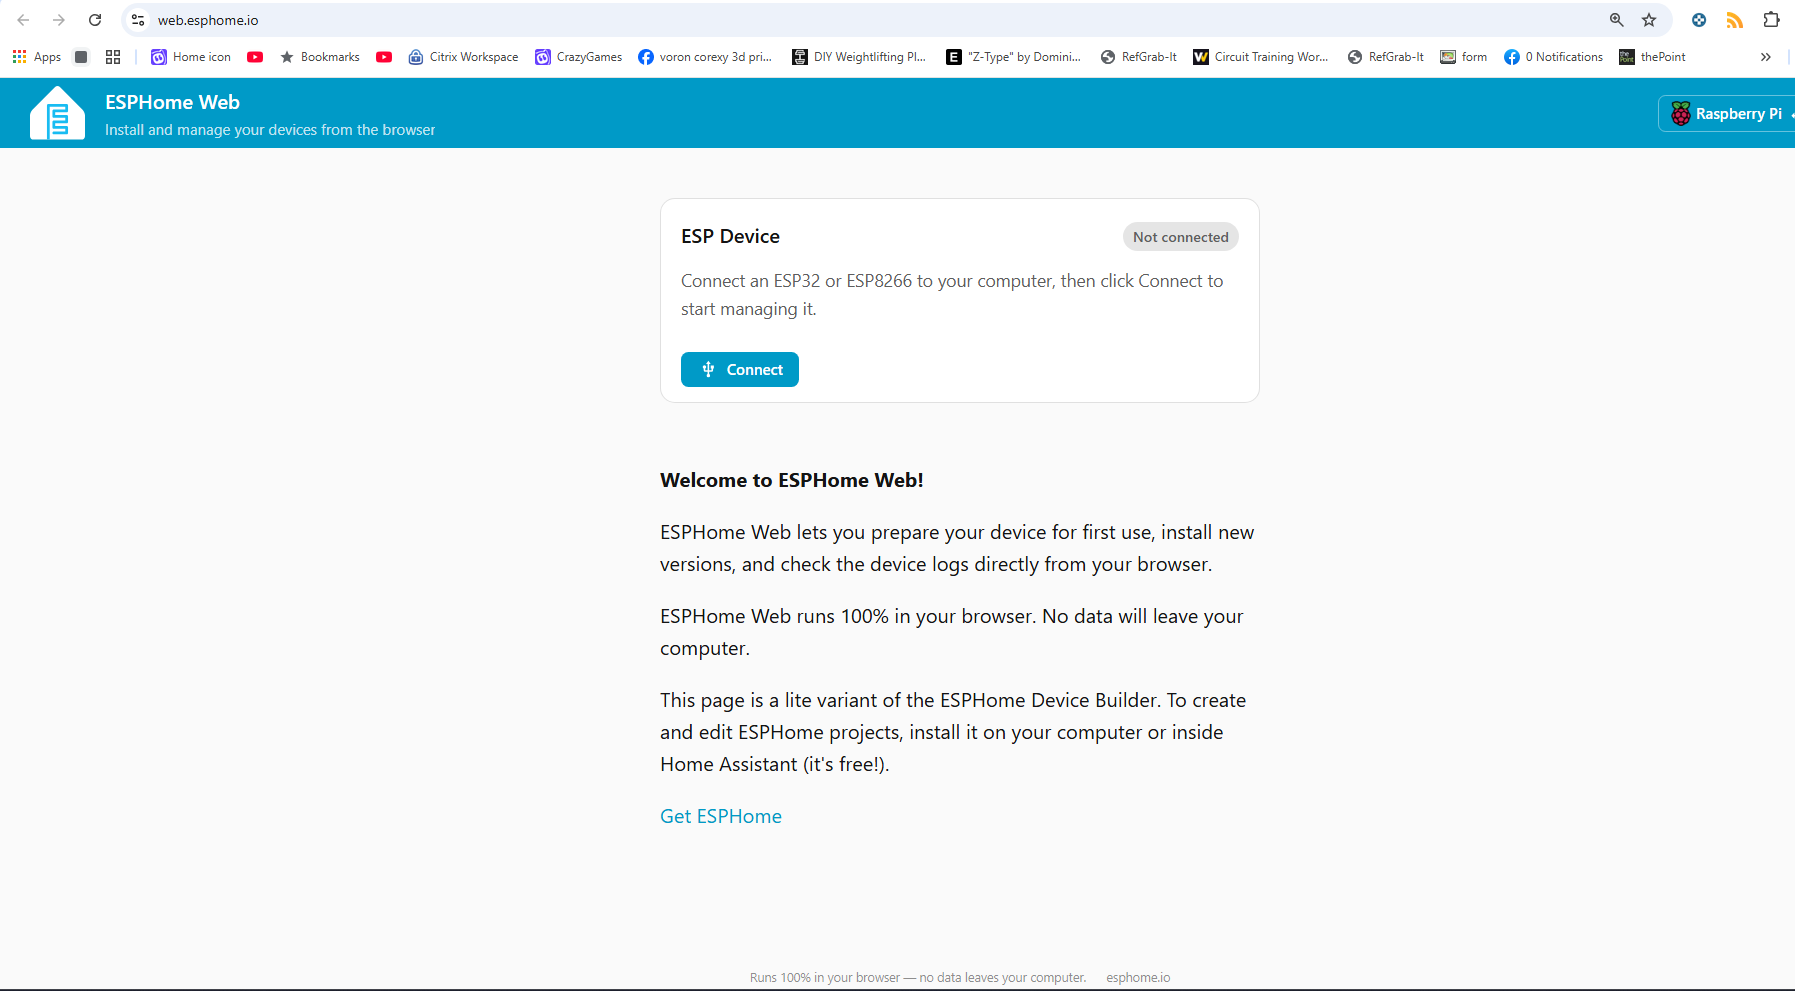
1. On the ESPHome Web page, click the **Connect** button.
[](https://skywiki.coffee/uploads/images/gallery/2026-09/image.png)
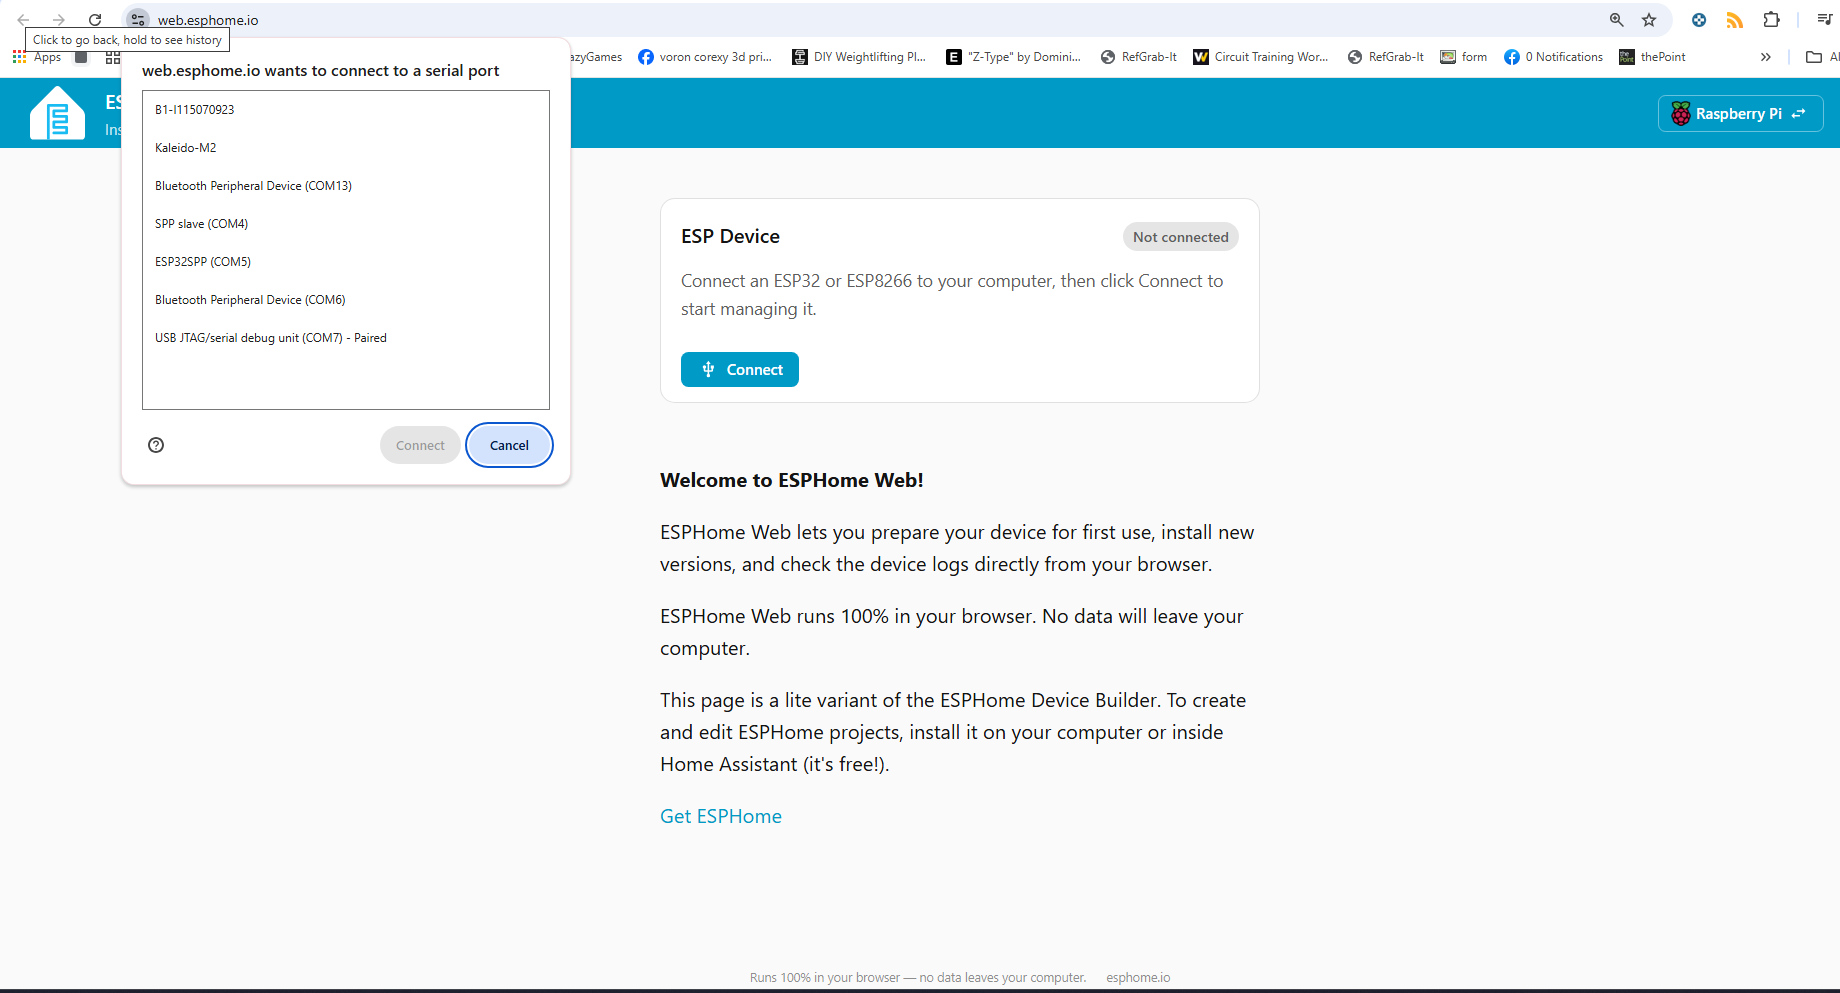
2. A pop-up will appear with available devices. Select the port for your ESP32-S3 and click **Connect**.
[](https://skywiki.coffee/uploads/images/gallery/2026-09/PmWimage.png)
---
#### **4. Install the Binary File**
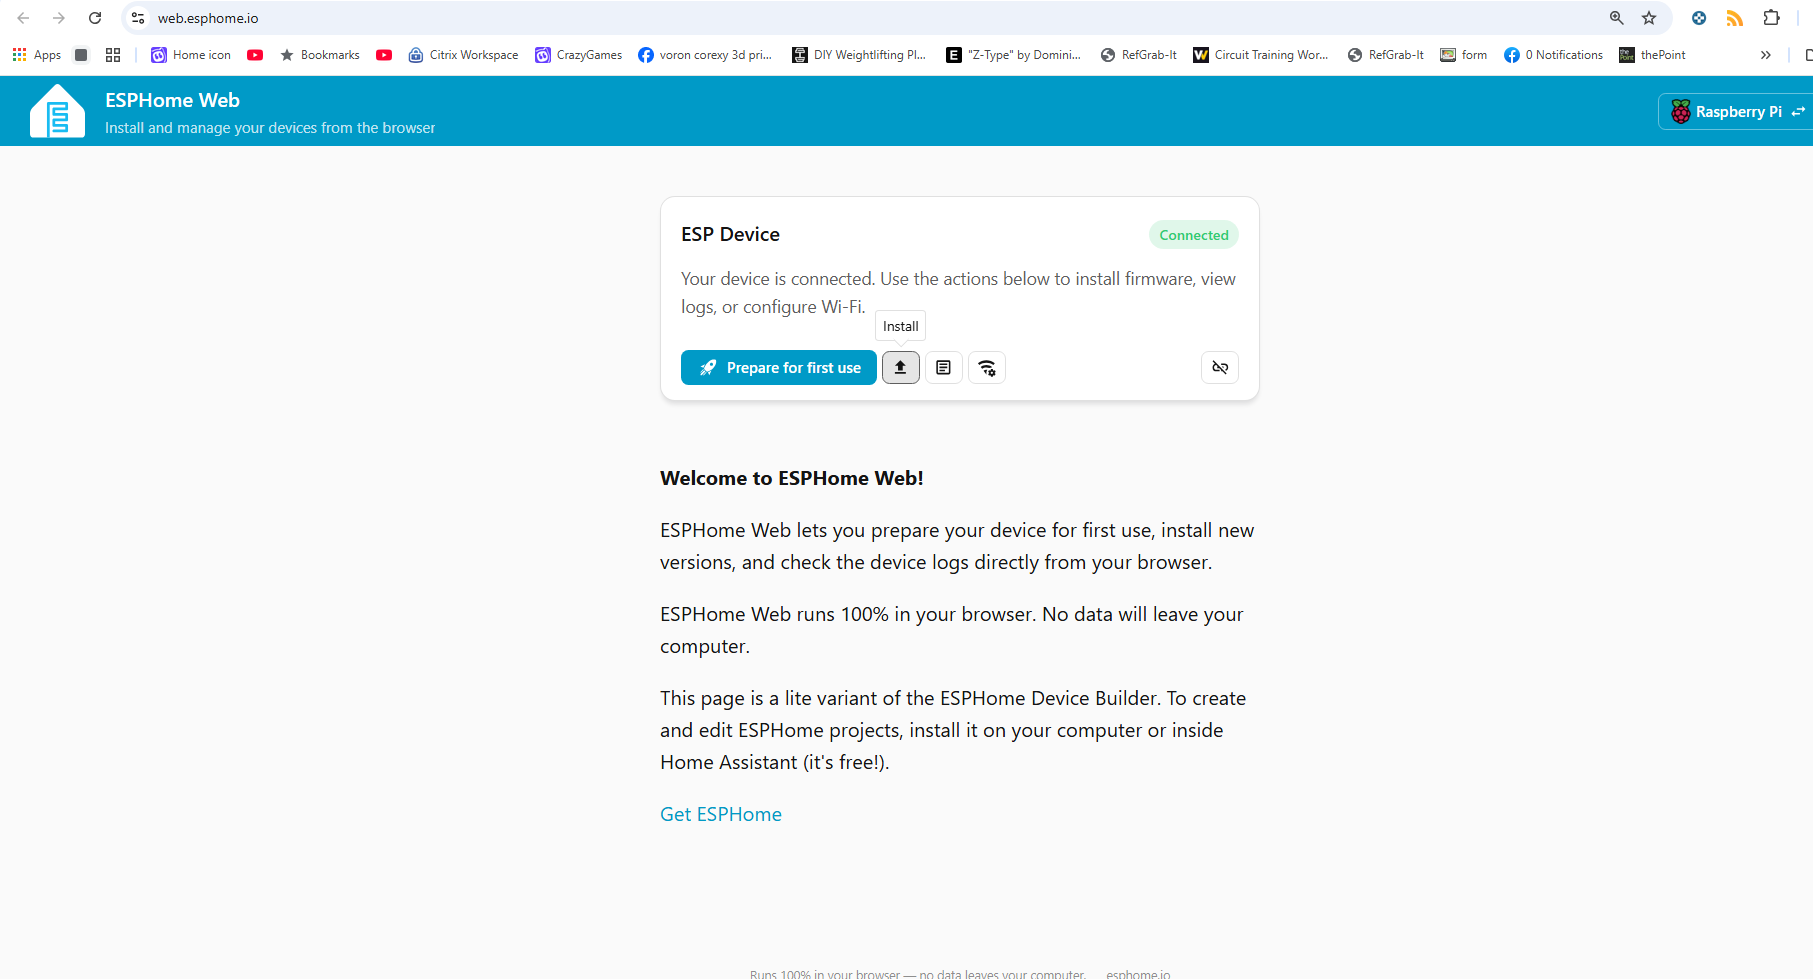
1. Once connected, click **Install**.
[](https://skywiki.coffee/uploads/images/gallery/2026-09/RHZimage.png)
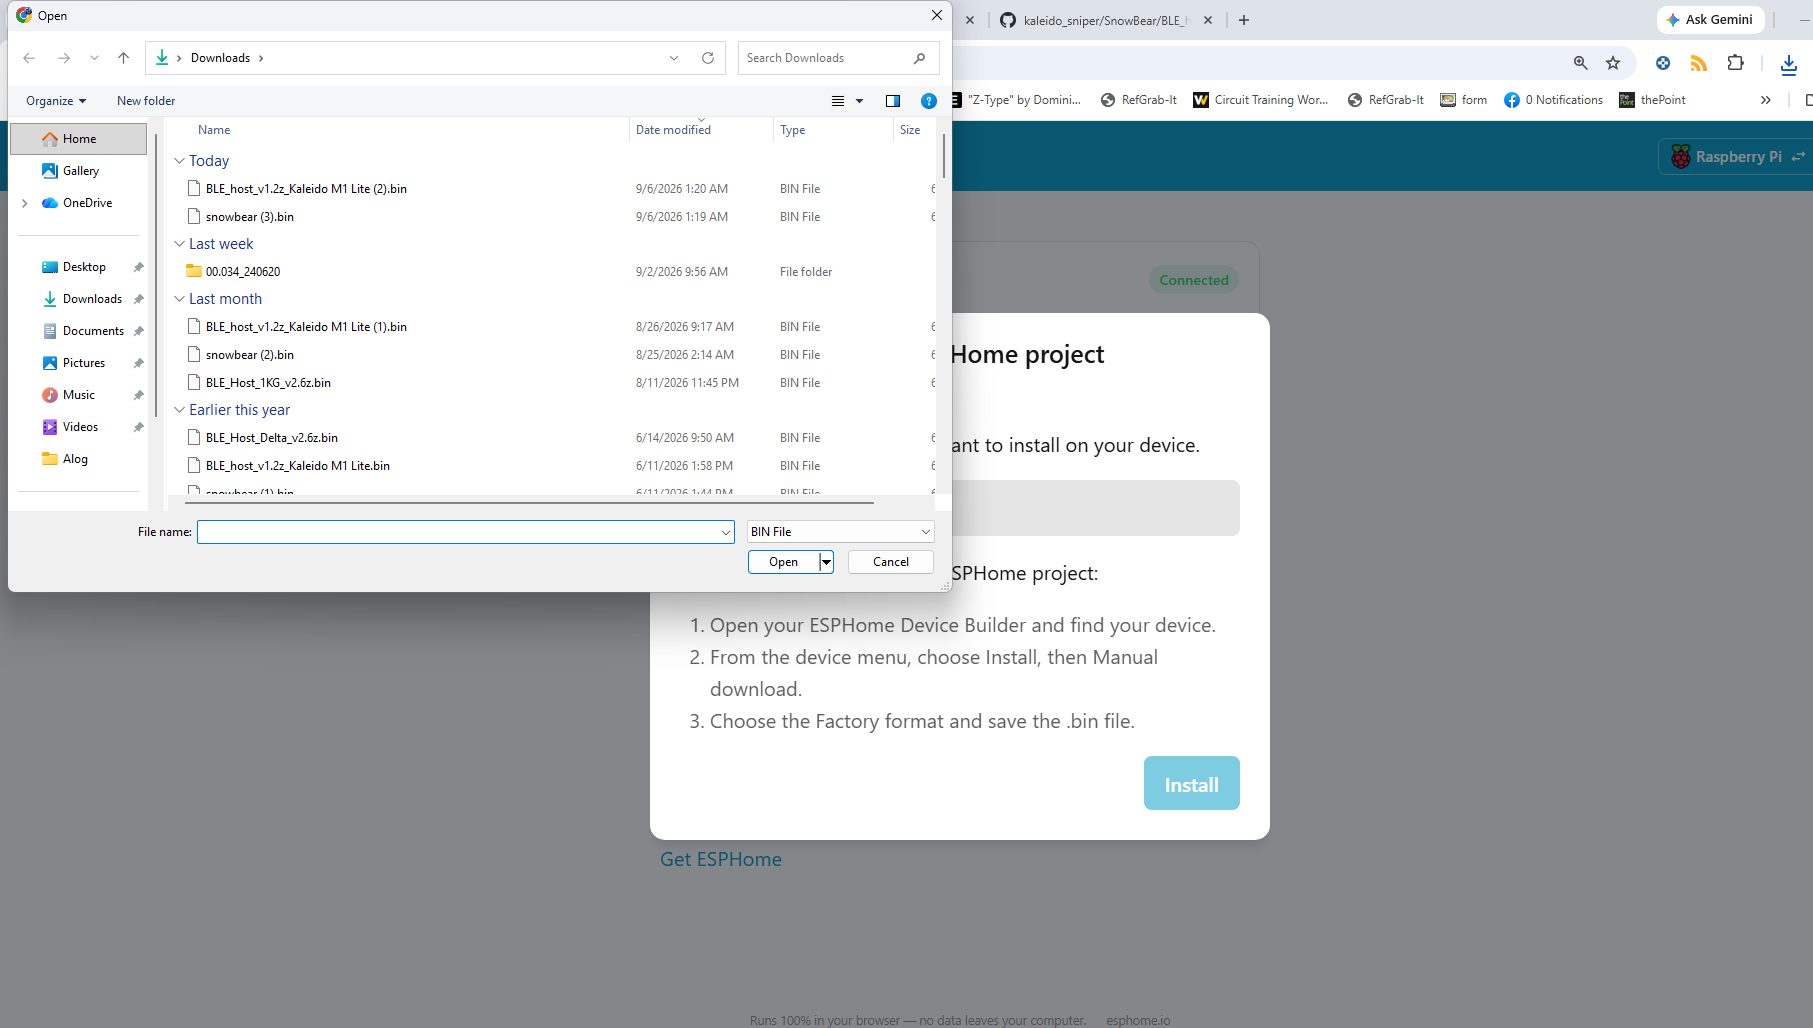
2. Choose **File** when prompted
3. In the file selection dialog, locate and select the BLE\_host\_v1.2z\_Kaleido\_SnowBear.bin bin file you downloaded earlier.
[](https://skywiki.coffee/uploads/images/gallery/2026-09/rjNimage.png)
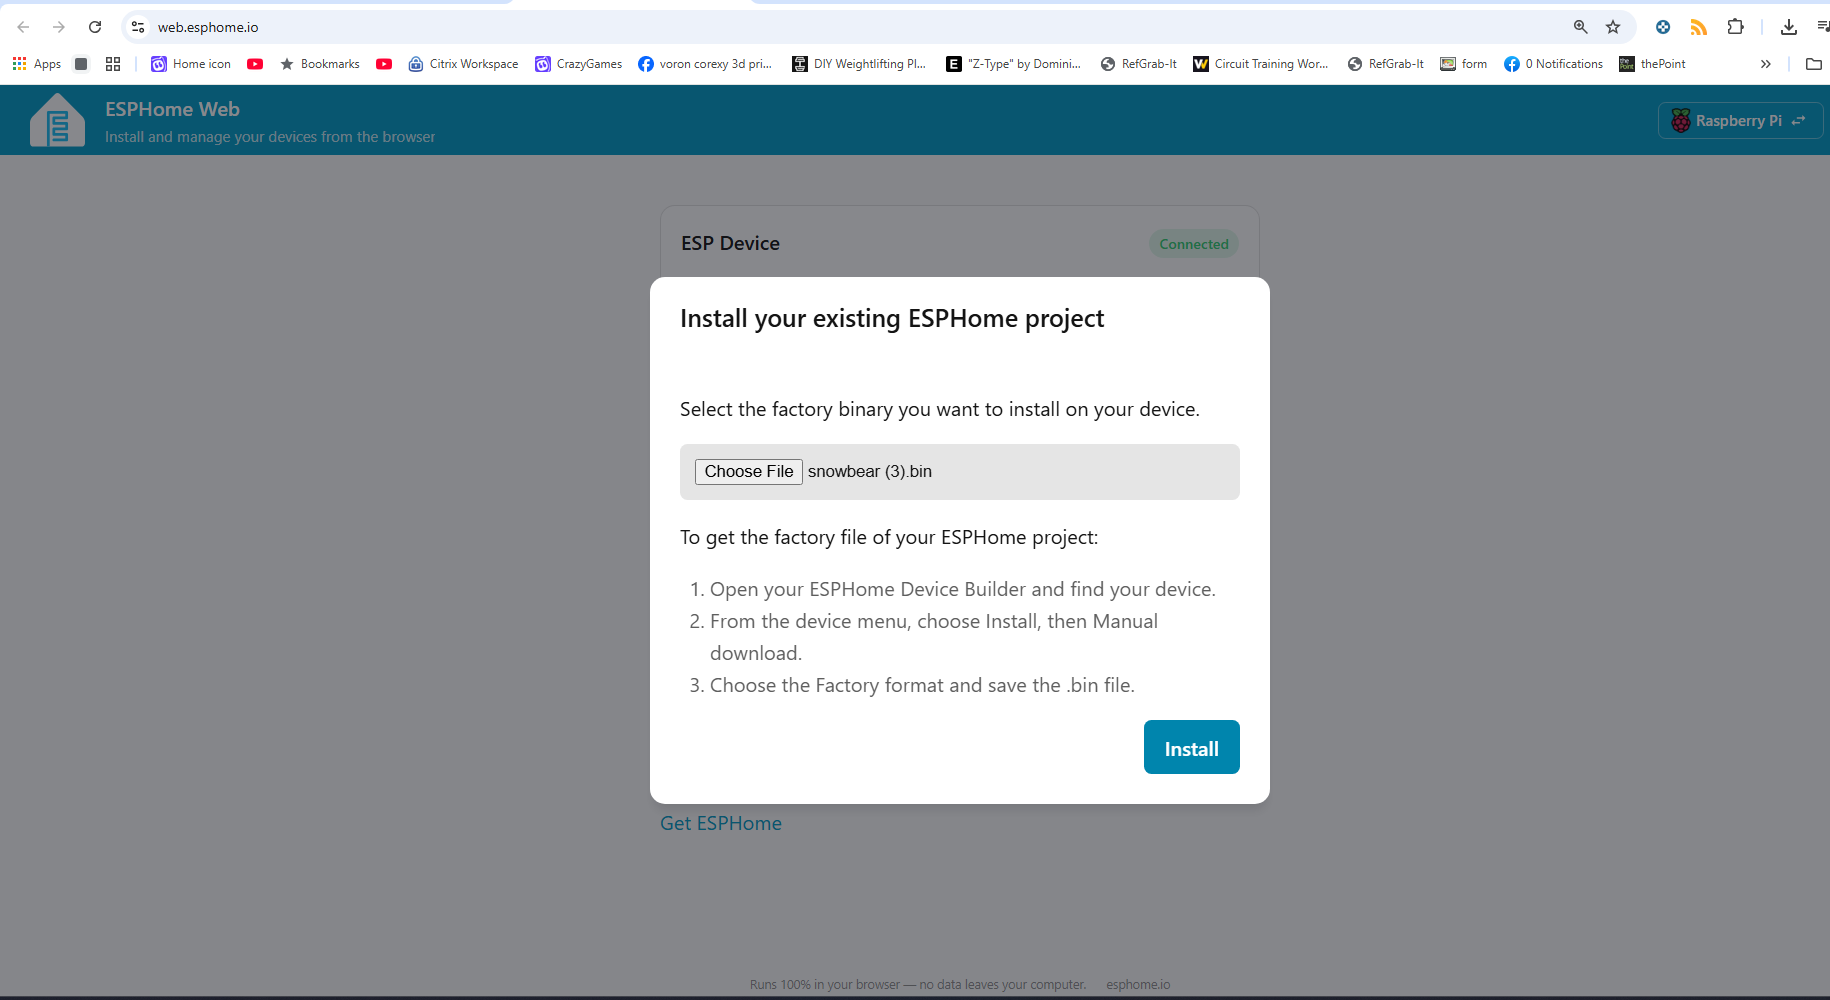
4. Click **Install** to start the flashing process.
5. [](https://skywiki.coffee/uploads/images/gallery/2026-09/x5Fimage.png)
---
#### **5. Flash the Firmware**
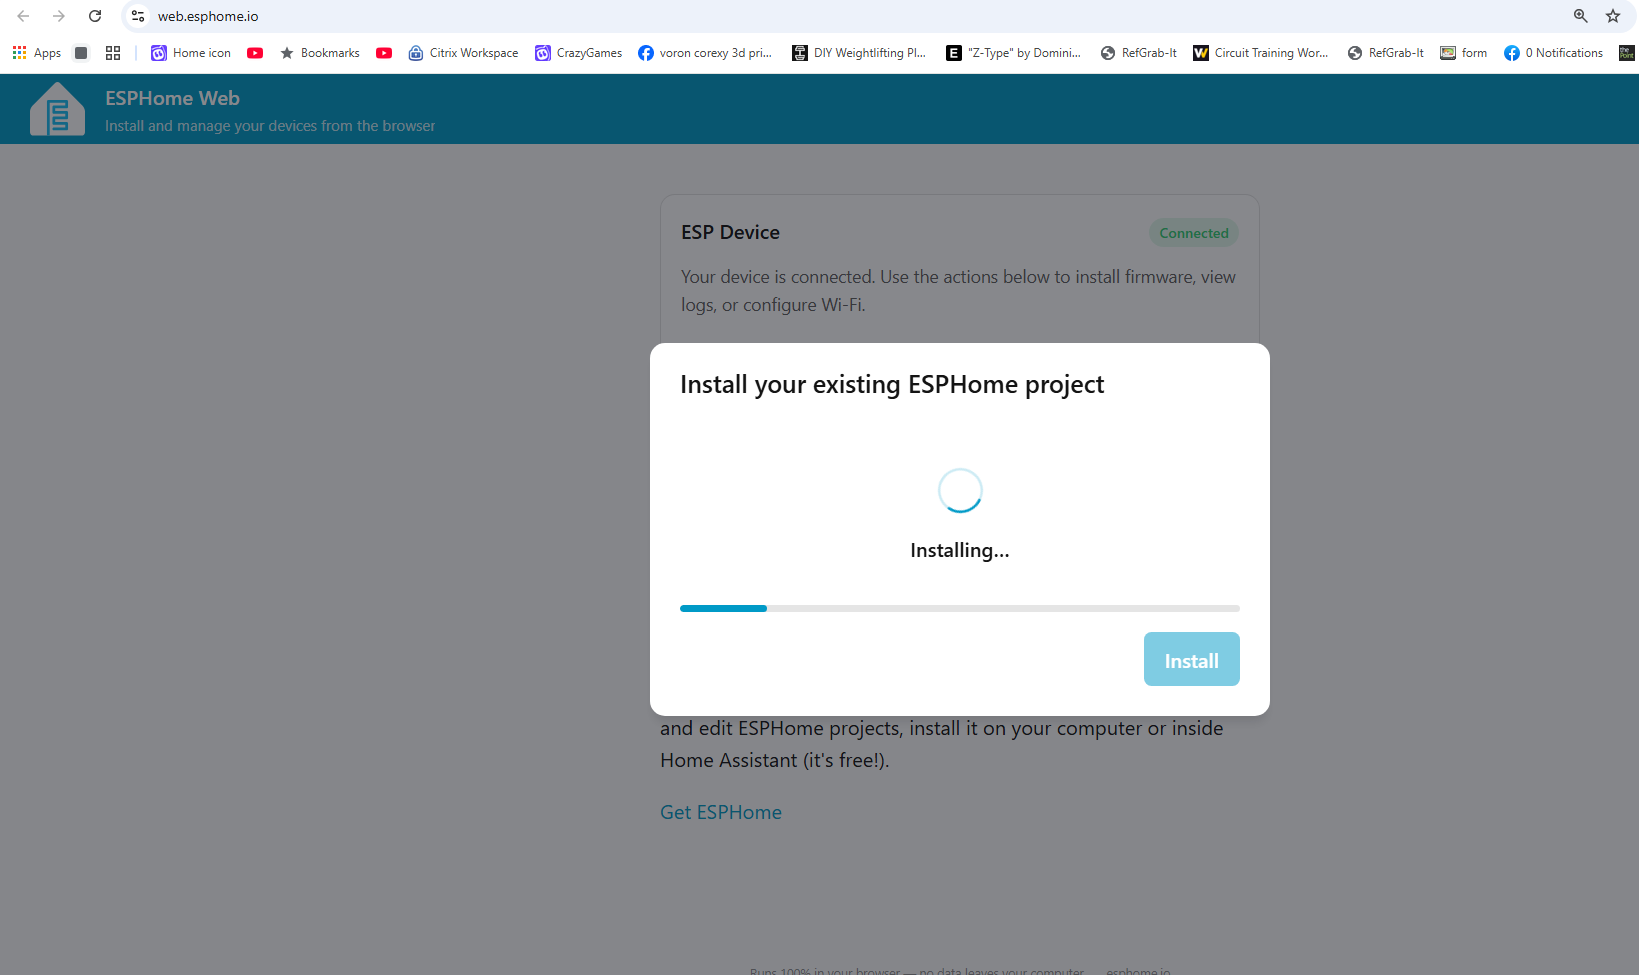
1. ESPHome Web will erase the existing firmware and flash the BLE\_host\_v1.2z\_Kaleido\_SnowBear.bin binary.
[](https://skywiki.coffee/uploads/images/gallery/2026-09/VJGimage.png)
2. The flashing process may take a few minutes. Wait for it to complete.
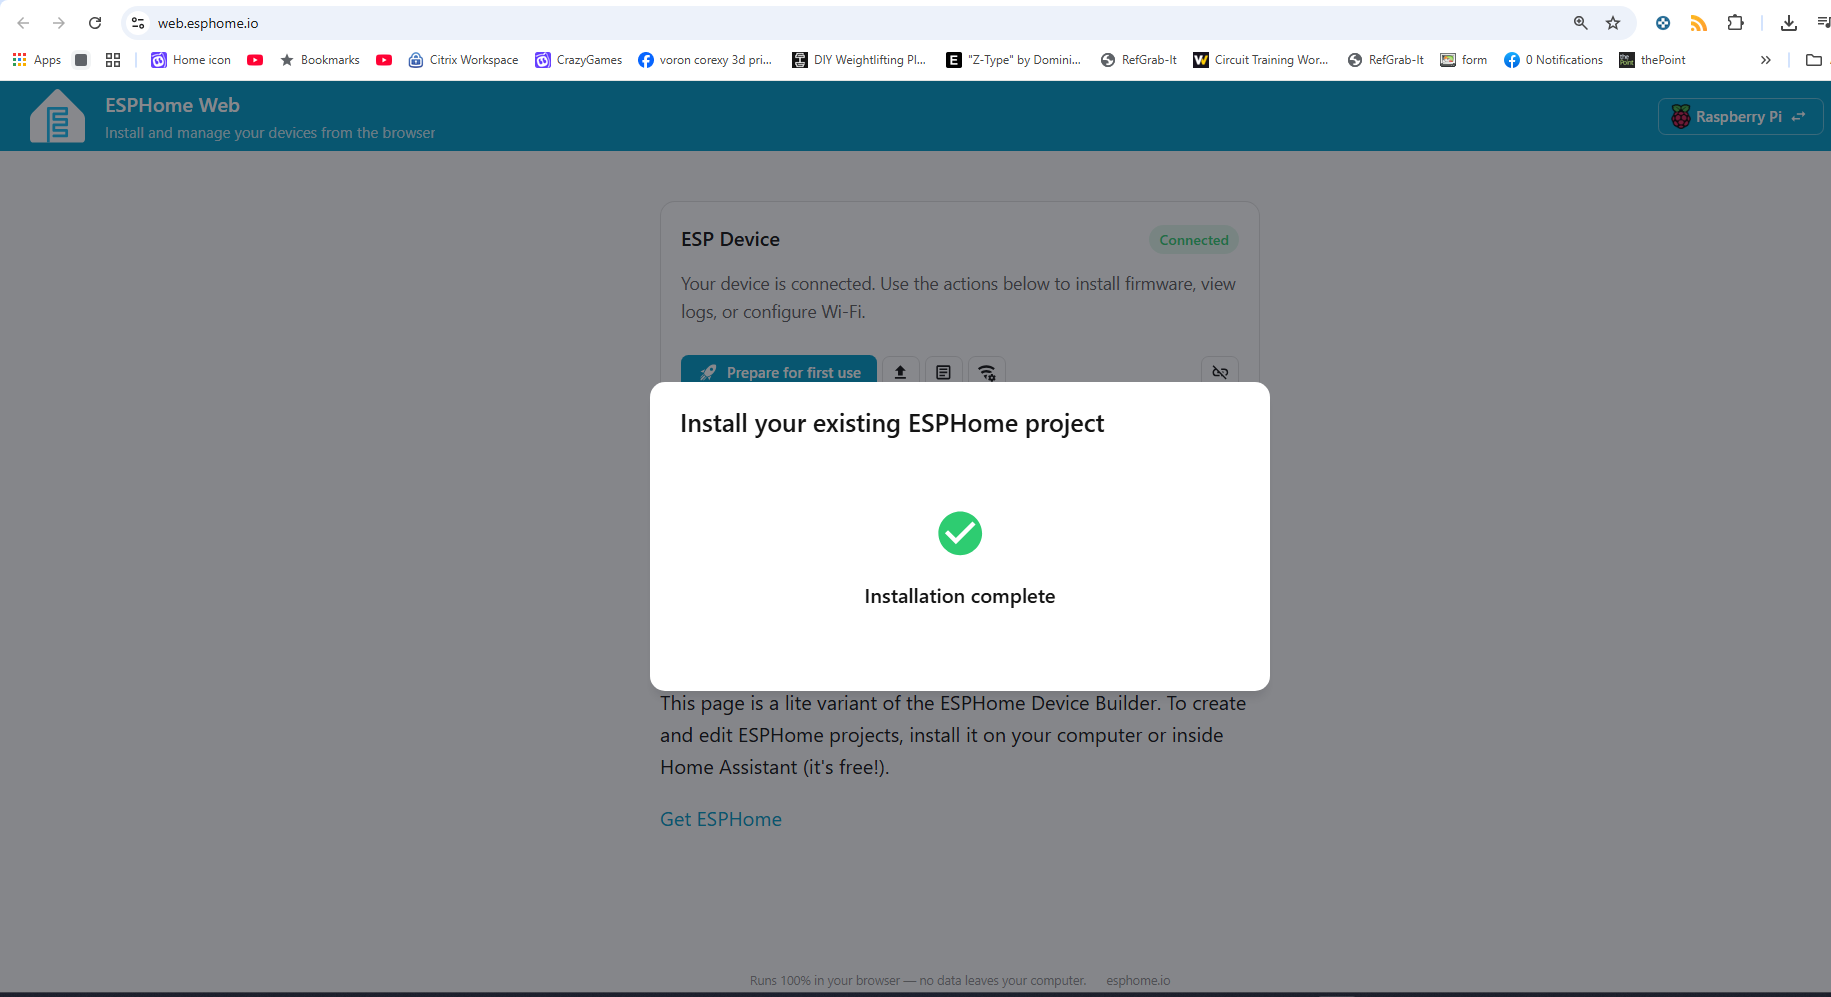
3. After successful installation, a success message will appear.
[](https://skywiki.coffee/uploads/images/gallery/2026-09/TNsimage.png)
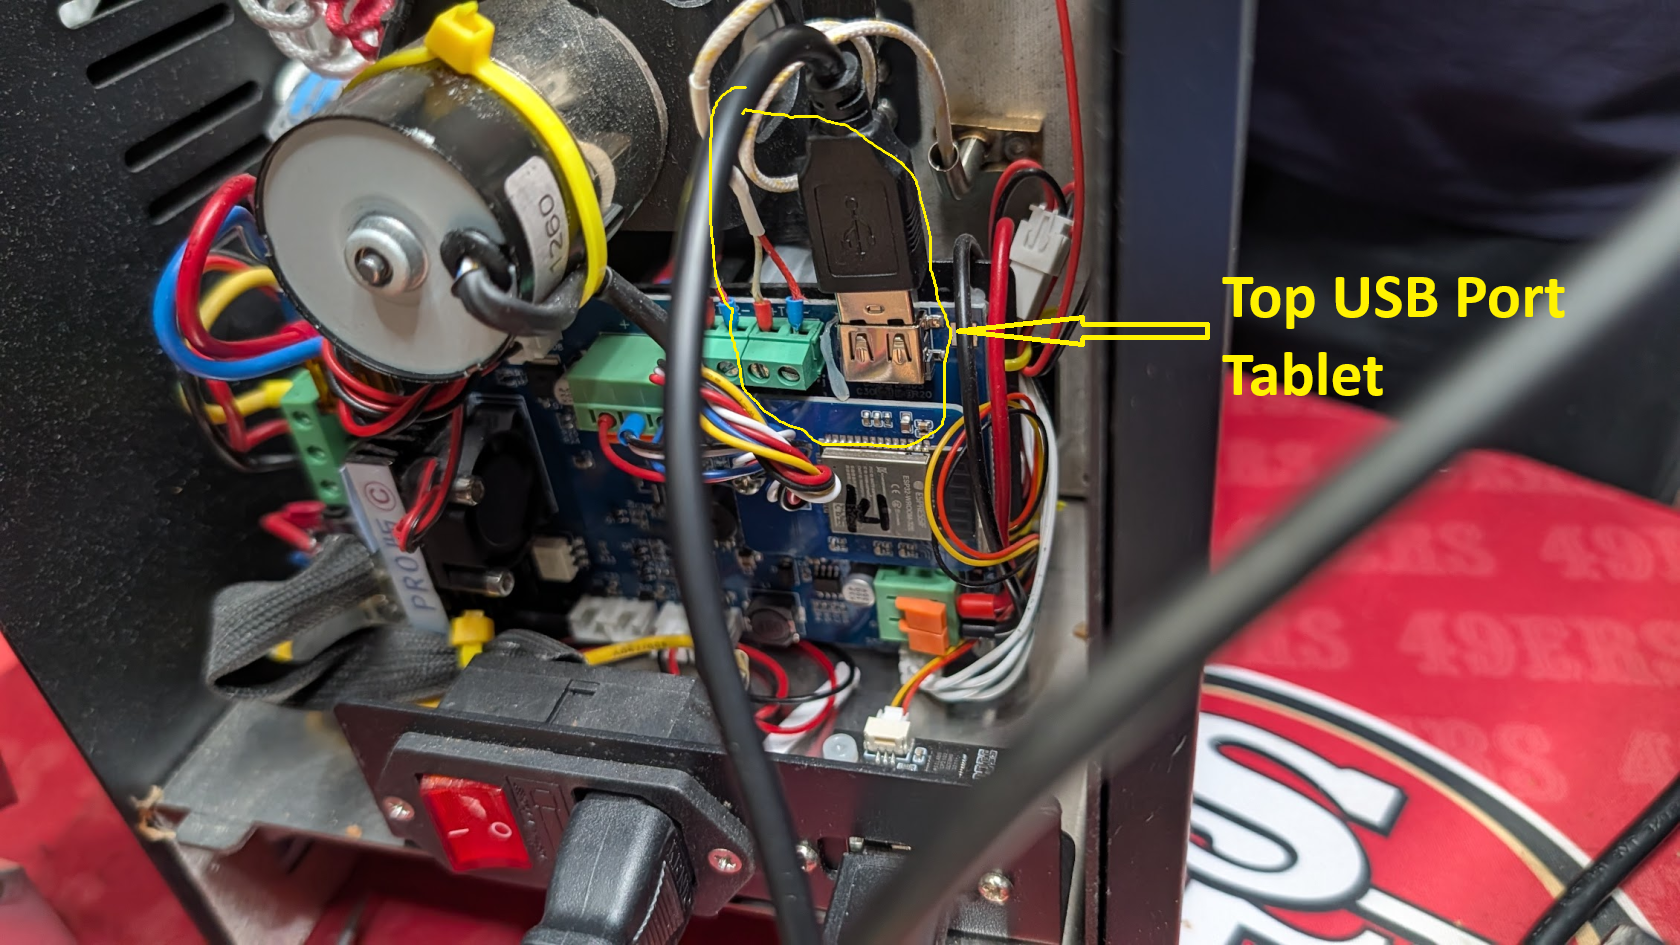
#### 6a. Plug into Kaleido Tablet USB Port. (Top USB (or JST-XH) port)
[](https://skywiki.coffee/uploads/images/gallery/2026-09/q1ktop.png)
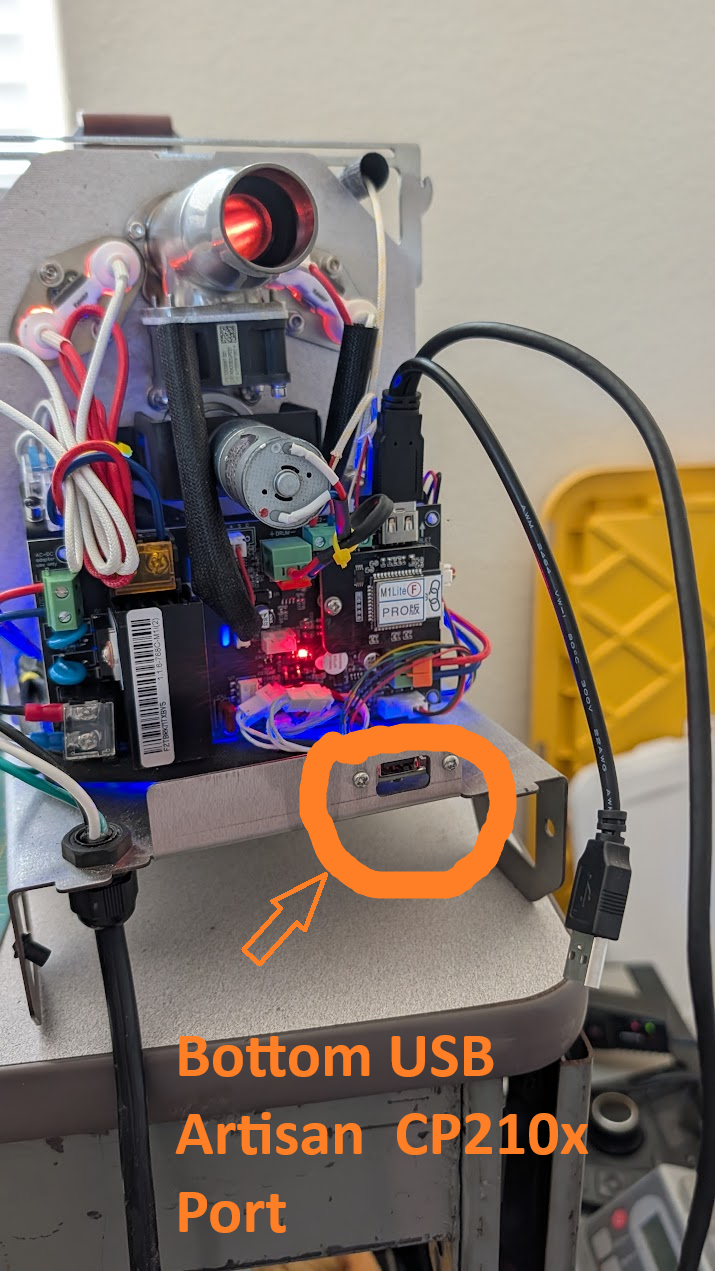
#### 6b. Plug into Artisan Tablet USB Port. (Bottom USB port not the bottom)
[](https://skywiki.coffee/uploads/images/gallery/2026-09/cp10x.png)
---
### **Direct Link to Binary File**
---
### **Troubleshooting**
- **Device Not Recognized**: Ensure your USB cable supports data transfer.
- **Flashing Errors**
- **Hold BOOT and press RESET (recommended method):**
1. Hold down the **BOOT** button.
2. While holding BOOT, press and release the **RESET** button.
3. Continue holding BOOT for a second, then release it.
1. 1. **Unplug and replug while holding the BOOT button:**
1. Disconnect the ESP32-S3 from power (USB).
2. Press and hold the **BOOT** button.
3. While holding BOOT, plug the USB back in.
4. Once connected, release the BOOT button.
- Let me know if you encounter issues or need further help!
- Not all wires are the same ensure your wire has Data Wires not a 2 strand charging wire.
BIG Thank you to Bear of the Skywalker Community Discord and Will\_Z for getting this option to work.